Embed Jira issue data in Confluence
Use Advanced Issue Macro to embed issue data from Jira into a Confluence page or blog post. The vast majority of out-of-the-box Jira issue fields and custom field types are supported. Data can be embedded as a table, chart, summary or individual issue fields.
Advanced Issue Macro always displays inline, without pagination or additional chrome, so that it appears indistinguishable from surrounding content. The macro can be resized to make embedded data larger or smaller so it fits your page or template (which is especially great for charts). See: Resize embedded issue data.
Ensure a connection to Jira has been set up
A connection to Jira must be set up before issue data can be embedded from that Jira site. Connections can be established to multiple Jira sites. This allows issue data from various locations to be embedded in a single Confluence page or blog post.
Note: You no longer need to add a ‘Connection to Jira’ macro before embedding data. Advanced Issue Macro now connects directly to Jira.
Embed data from one or more issues
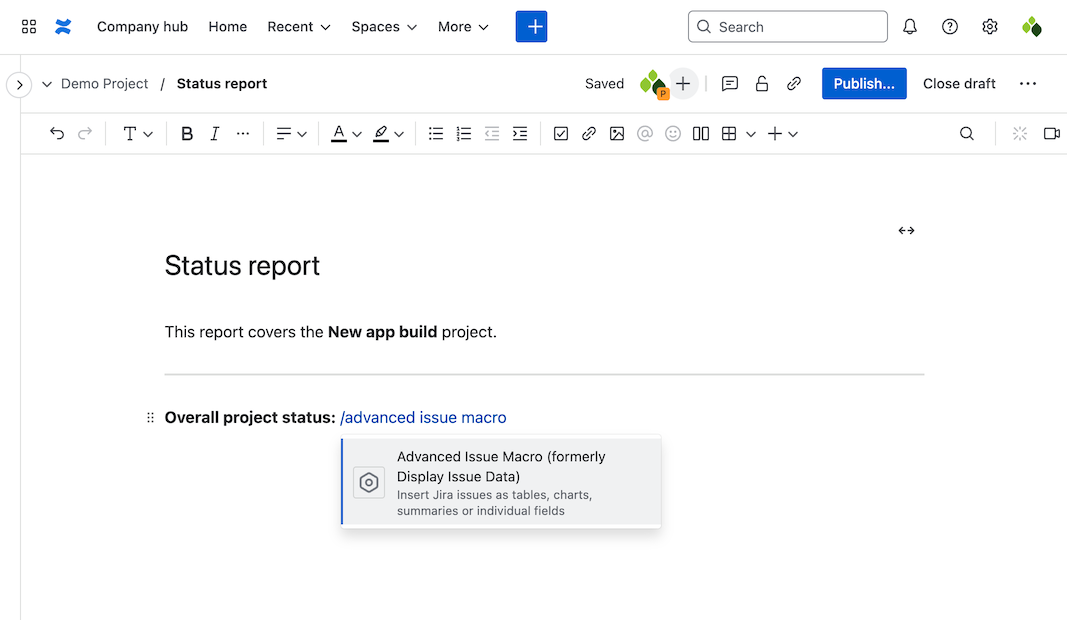
Add an Advanced Issue Macro to embed data from Jira. Type / (forward slash) while in edit mode, then type Advanced Issue Macro and select the macro from the list. This will add it to the document.
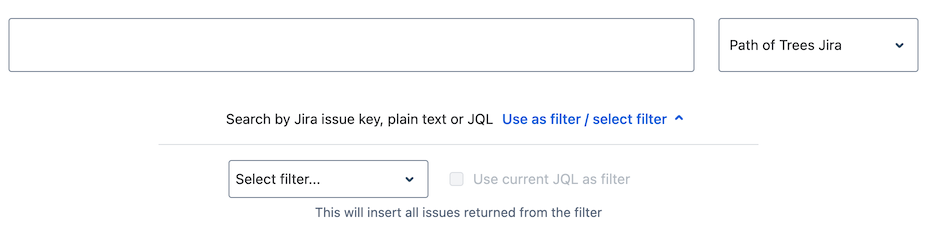
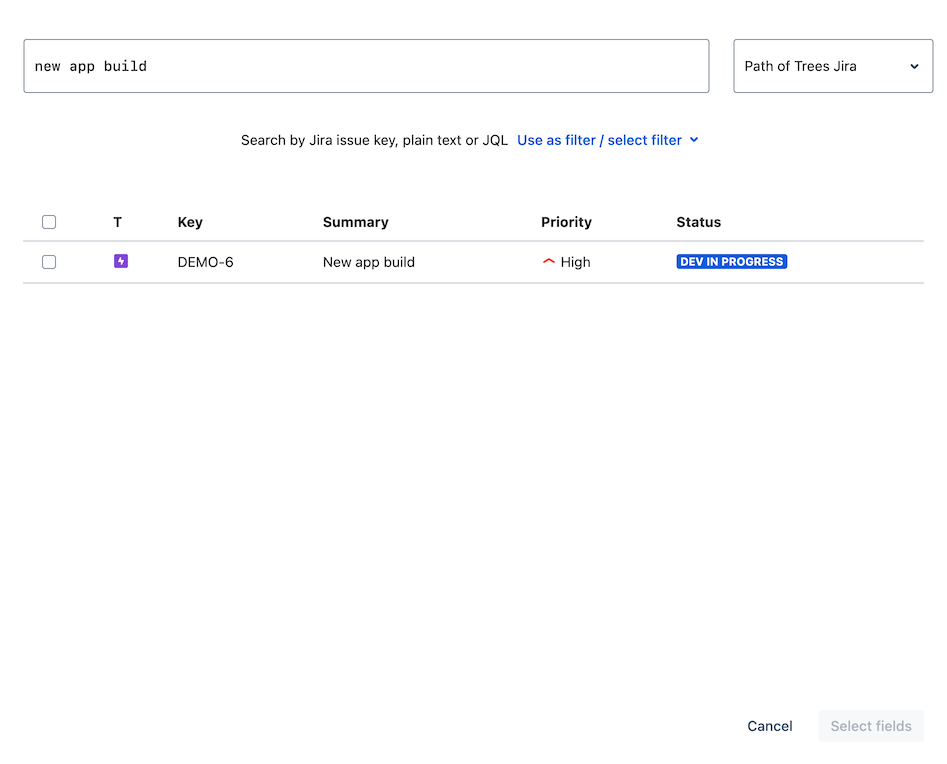
A modal dialog will open, allowing you to search for, and select, Jira issues. Search for issues in the search box at the top. You can search by Jira issue key, plain text or JQL.
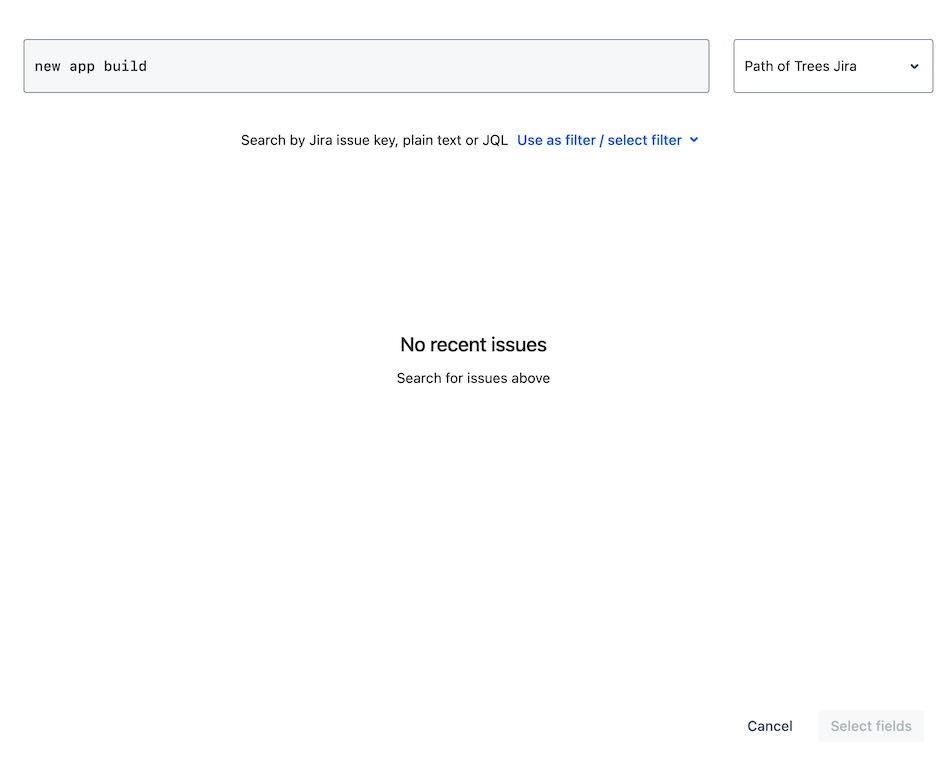
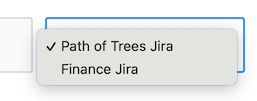
If needed, select a different connection to Jira using the connections selector at the top right of the modal.
You can also select an existing Jira filter via the Use as filter / select filter control. See embed issues using a Jira filter and embed all issues matching a JQL query.
Select one or more Jira issues from the displayed results and then click Select fields at the bottom right.
This will display a preview of your selected issue/s. Choose how the embedded issues will display from the options at the bottom of the modal. By default issue data will be displayed as a set of inline fields, however you can also select to embed issue data as a table, chart or summary. See:
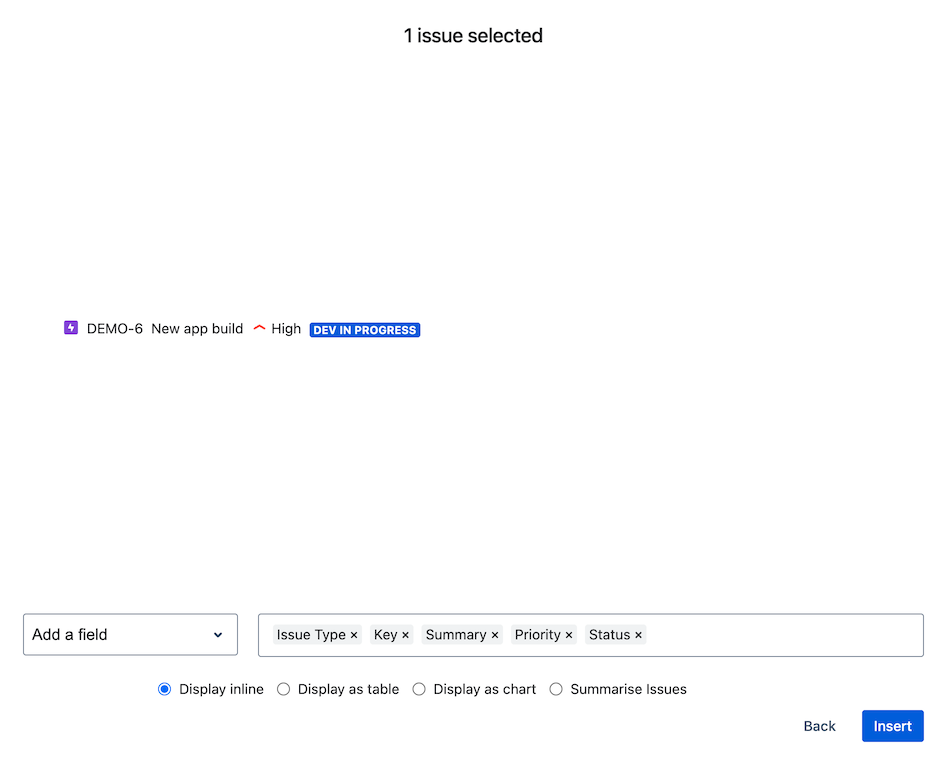
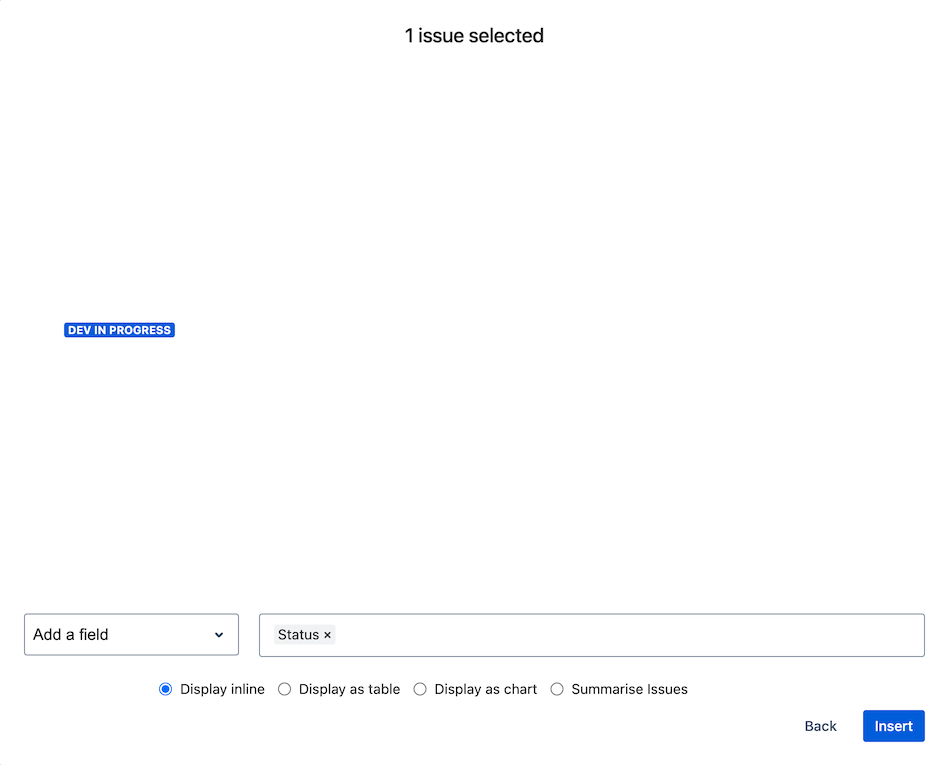
Add, remove and reorder fields using the controls at the bottom of the modal. Add fields using the Add a field selector. To locate a specific field, begin typing the field name to filter the list. Added fields immediately show in the issue preview.
If an added field appears to be missing from the preview, the most likely reason is that it currently has no data. Such fields can still be embedded in Confluence - they will automatically display data if the field is populated in Jira. Advanced Issue Macro refreshes data automatically in the background so the latest information is shown in Confluence.
Remove fields by clicking the x icon next to the displayed field in the fields list. Removed fields can be re-added using the Add a field selector.
Reorder fields by clicking and dragging the field in the fields list. This will immediately update the issue preview. Fields can be arranged in any order.
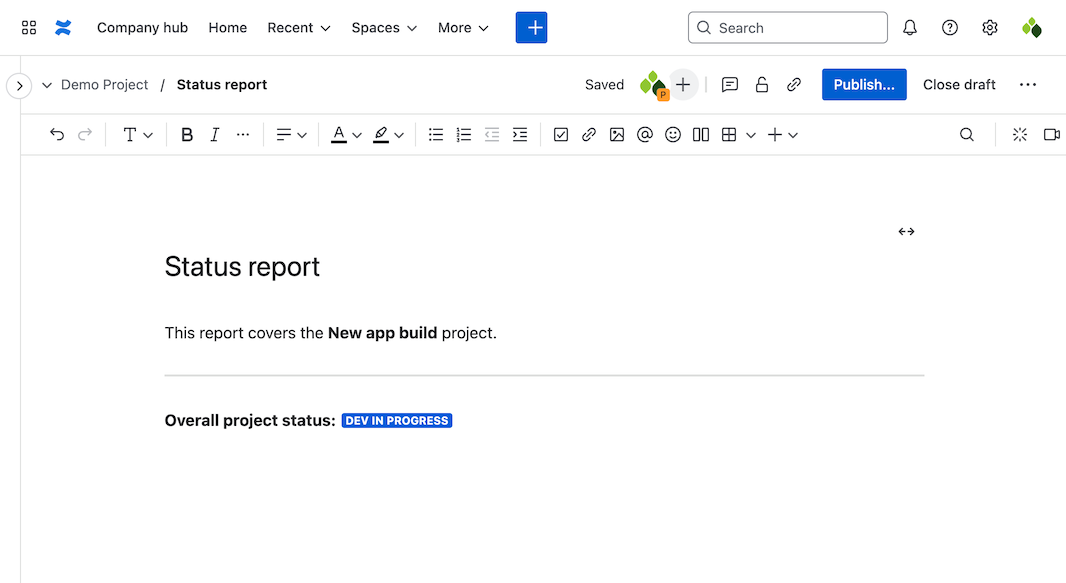
In the example below we have selected a single field using the controls described above. When you have finished configuring fields, click Insert to embed the issue into Confluence. This will use the field selections you have chosen.
Issue data is rendered inline so that it appears indistinguishable from surrounding content. The vast majority of out-of-the-box Jira issue fields and custom field types are supported.